
Sometimes your muse gives you the most fantastic ideas. And sometimes you really need to give your muse a kick in the butt… Mine actually whispered to me years ago what a fantastic idea it would be if I made a fly curtain out of empty spools of thread instead of beads! I had never seen anything like it anywhere, not even on Pinterest, so this was bound to be super-original too. (Spoiler: I know by now why no one else did this…)
So I started saving empty spools. Because making a curtain from spools that were actually used would be best for the project – buying wouldn’t feel right.
And I kept saving.
And saving.
Eventually I figured this would take me a lifetime, so I asked friends and my sewing classmates for help. They also diligently began saving up empty spools for me that they donated to me periodically.
So the saving continued.
At a later time, I repeated my call for help. And kept saving some more.
Because do you know how many friggin’ spools you need to make a curtain like that??
I don’t remember exactly when I started saving, but it could easily have been 8(!) years ago. I regularly sorted out the spools and checked how far I was getting by laying everything out on the floor. Admittedly, I saved far more thread spools than I needed for the curtain, but spools come in many different shapes and sizes. And I realized that using only the small ones would yield the best result. I experimented a bit with strands of different sized spools on the sides, for example, or a row of larger spools at the top and bottom, but ultimately decided to use only the small ones. And so I had to keep saving up longer.
Only recently did I decide that I finally had enough and that I could finally finish this stupid project! Hooray!
Once I had enough, I laid all the spools out neatly in a nice pattern on the floor. Some spools were quite yellowed and others a little, but I made use of that in the pattern: the most yellowed ones are in the middle, so that you get a sort of gradient from yellowish to bright white towards the outer edges.
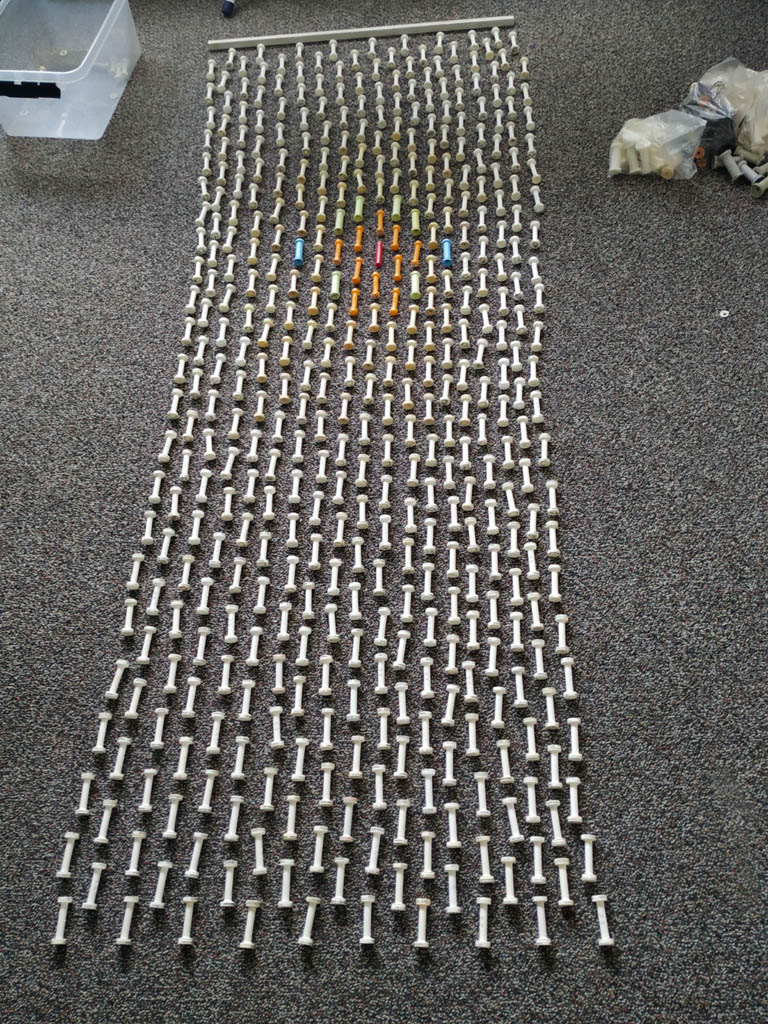
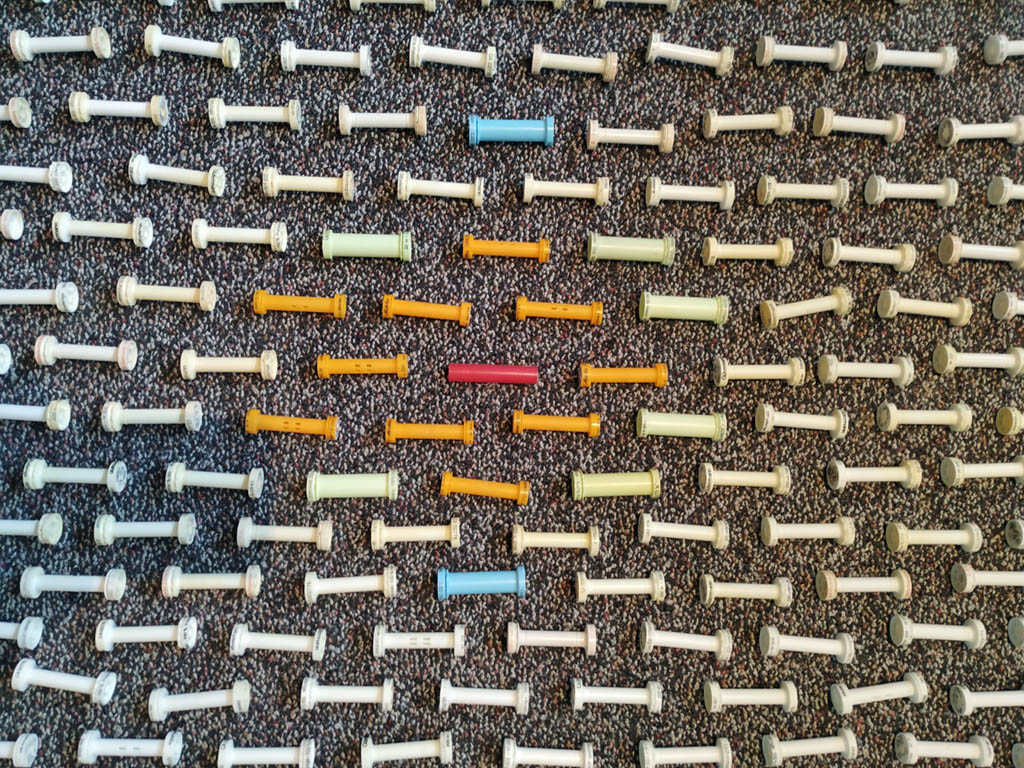
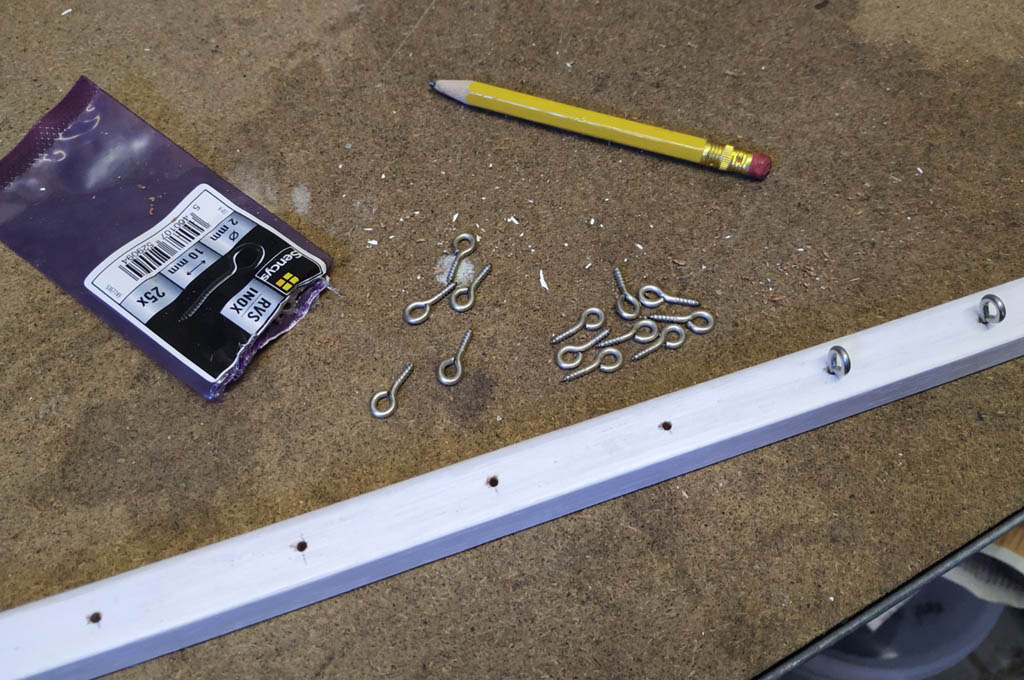
Next, I sawed a small wooden strip (a remnant of another project that was still lying in my shed) to size, painted it white, and screwed metal eyelets into it.
The biggest challenge of this project was figuring out how to ensure the spools stayed attached to the cord (I used cotton cord from the hardware store). Stringing them all directly against each other would result in rigid and unattractive strands (and cost even more spools). The openings in yarn spools are quite large, so simply tying a knot in the cord or using crimp beads wasn’t going to work. I ultimately opted for wooden beads (that I had to buy), which I threaded onto the top and bottom of the spools, with the idea that I could hold those beads in place with a knot in the cord.
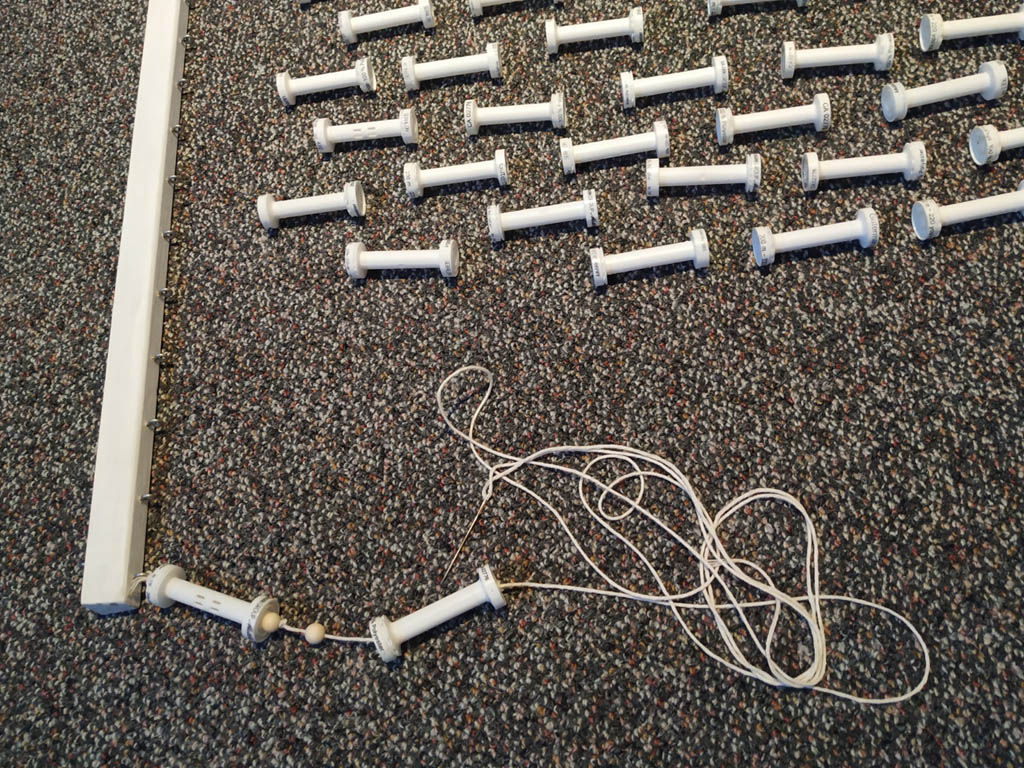
For some reason, I had convinced myself that I could easily tie this whole thing together in a day or two. Silly me. Once I started, I realized just how much of a job this was going to be. First of all, it was of course important that all the beads and spools were placed on the cord at exactly equal distances from each other, otherwise you would end up with a messy pattern. But the openings for the beads were also quite large, and it turned out that three overlapping knots were needed to prevent them from slipping down as well. Making three overlapping knots in a cord at exactly the right locations every time is quite something, I can tell you. And of course, not all the spools were the same length either, because they are from different brands. With one, for example, the top is perfectly straight, while with another, the bead almost completely disappears into a dimple.
437 spools, 874 beads, about 44.5 meters of cord, and many hours sitting on the floor in uncomfortable positions later:
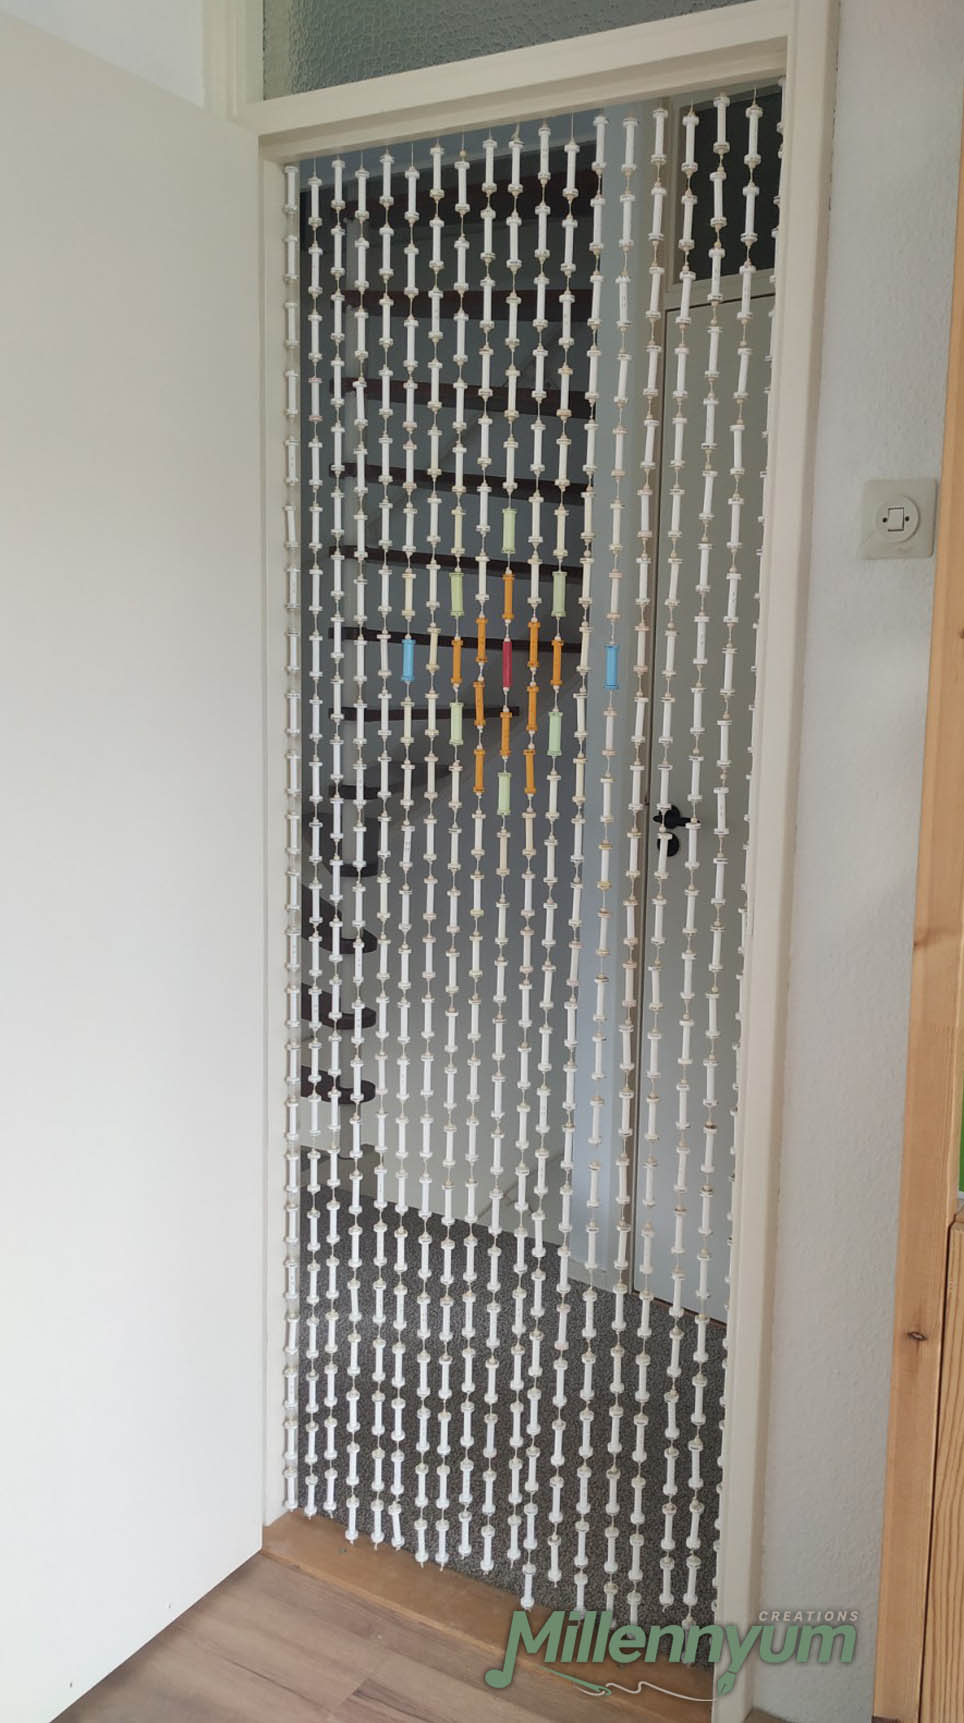
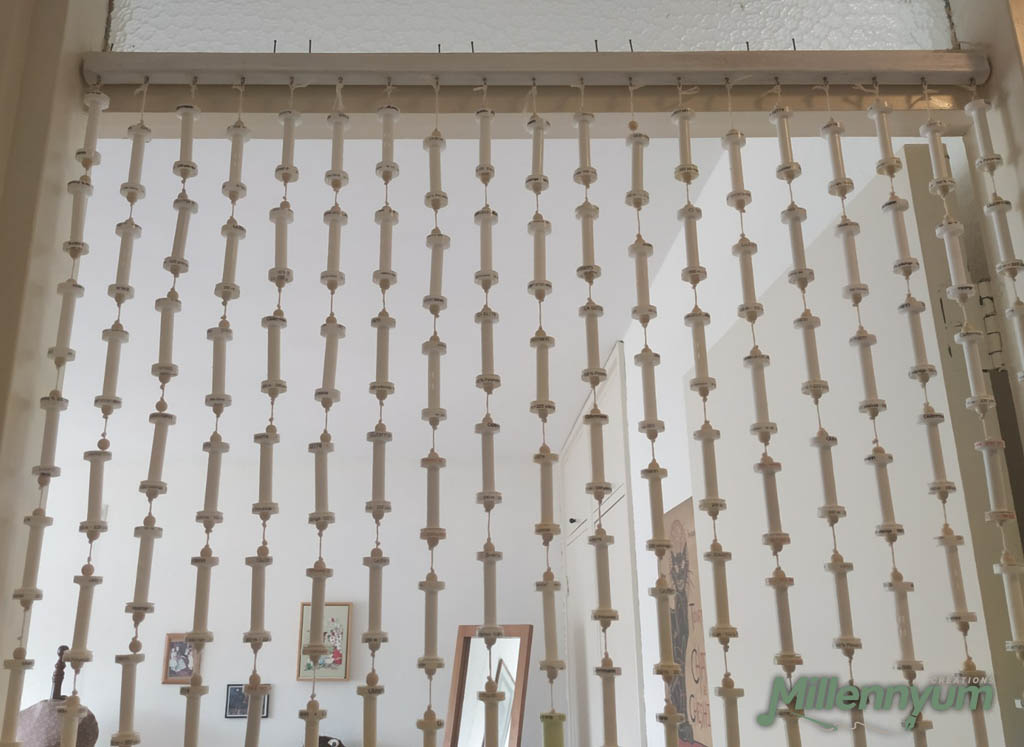
As you can see, unfortunately, I didn’t manage to knot everything at perfectly equal distances. If I had to do it again, I would tie everything in while the thing is already hanging rather than lying on the ground, because then you can see better if everything is hanging straight relative to each other.
What pleasantly surprises me, is that the strands don’t get tangled! I was afraid that, when walking through it, the cords would twist together in the places where there are no bobbins, meaning you would constantly have to untangle everything. But fortunately, that doesn’t happen. The spools even nicely roll along your body when you brush them.
I think this counts as my longest-running creative project! But now it’s finally out of my system. Are you happy now, Muse?? Because yes, you were right: this is a really nice result and also fits perfectly in the entrance to my atelier. But next time, would you please also think about the practical feasibility of your ideas…?
Cost: €35.29 (beads, cord, and eyelets)
Time spent: about 8 years…