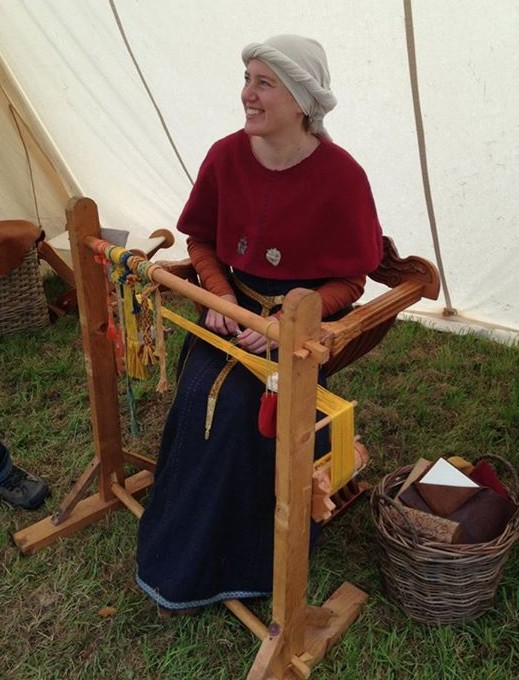
Since I have chosen tablet weaving (also called card weaving) as the second craft for my reenactment group, I needed a historically correct loom. I’ve never seen one ready-made in a store, so this was another do-it-yourself project, after doing some research!
I studied many images of medieval looms for tablet weaving. Most were gigantic installations – essentially two tall side posts, with two crossbeams in between for stability, around which the threads were simply knotted. But I have to be able to fit the thing into my car when I go to an event. Moreover, I had already experienced that constantly having to re-tie the threads every time their tension changes (due to the turning of the tablets), isn’t exactly practical, and winding the whole thing around a post makes it, once again, very difficult to keep the threads evenly tensioned.

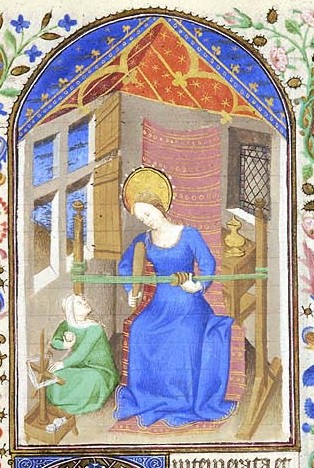

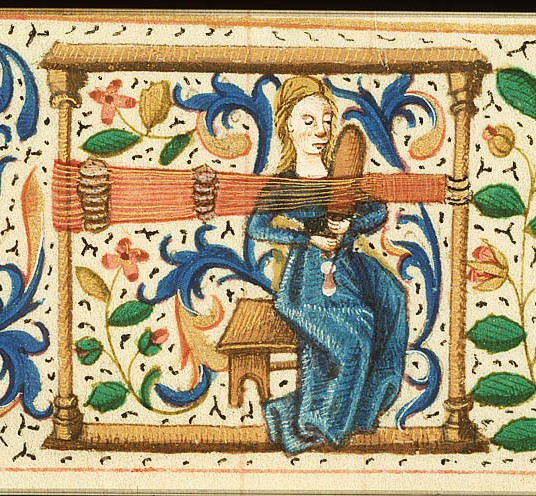
A construction with weights at the end of the threads is very handy for maintaining the correct tension, and also historically accurate regarding ordinary looms used to make fabrics. But I didn’t see them anywhere in combination with a card weaving loom, so that was ruled out as well.
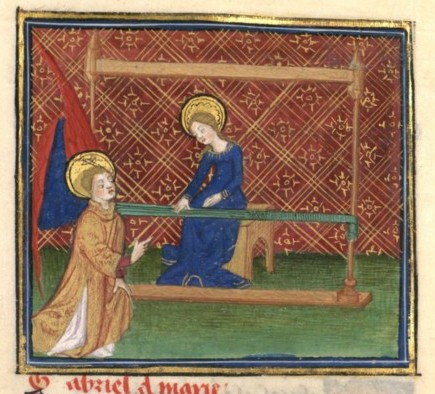
But then I discovered the following image:
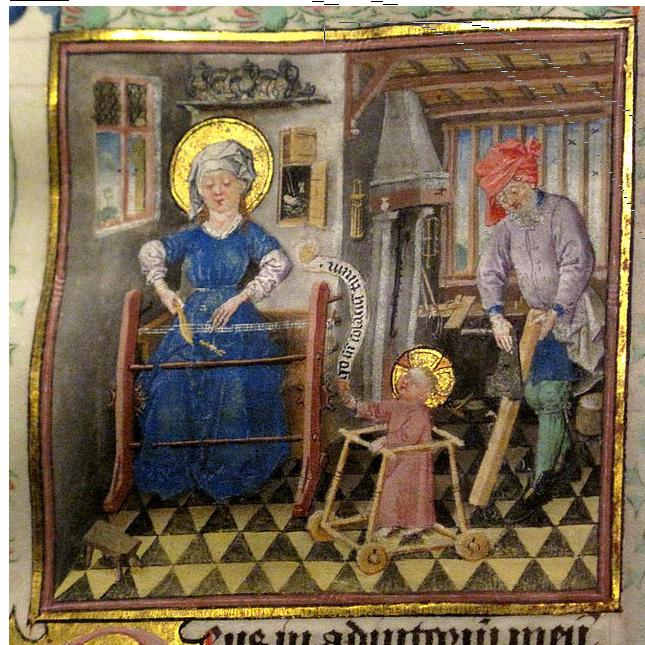
That opened up some possibilities! Because if you look closely, there are protruding sticks on the back of the thing Maria is working with, over which the threads are wound. And the whole thing is kept under tension by gears! That looks much more practical. Unfortunately, I don’t see any tablets, so it could also be a band loom (although I also don’t see a band weaving comb), but I’m assuming those things were used for both. In other words: this became the basis for my own tablet weaving loom. With the difference that it had to be detachable for transport.
As the image shows only the back of the loom, I had to make a guess about how the front, including the gears, would have looked. Fortunately, my reenactment group includes several enthusiastic and experienced woodworkers who had no problem brainstorming the construction with me, making specialized tools available, and helping me with production, so I ended up with this:
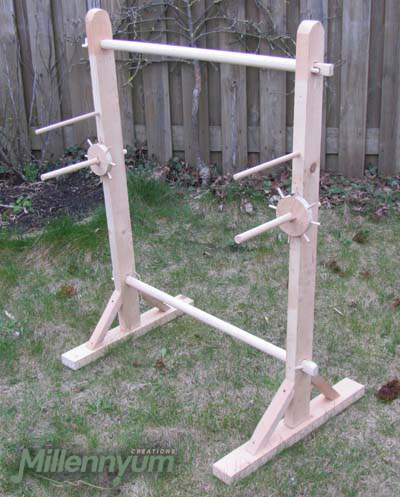
The top intermediate post is higher than in the image. I did that because I think otherwise my knees would hit it – or I would have to sit bent over very far to get good access to the weaving. In this case, preventing RSI really takes precedence over perfect replication, especially since those paintings weren’t always entirely true to life and the thing could therefore have looked quite a bit different in reality.
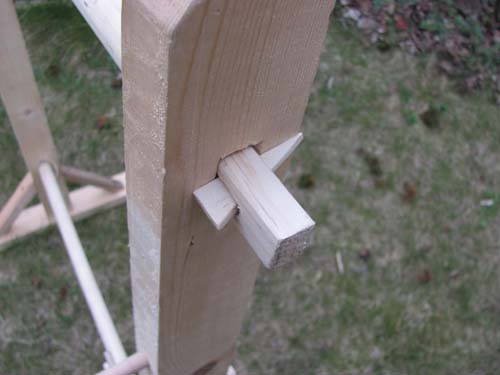
We used wedges to hold the parts together, enabling me to take the loom apart for transport. Unfortunately, the construction isn’t as stable as I would have liked, but it is more stable than I feared. 😉
These are the gears we initially developed:
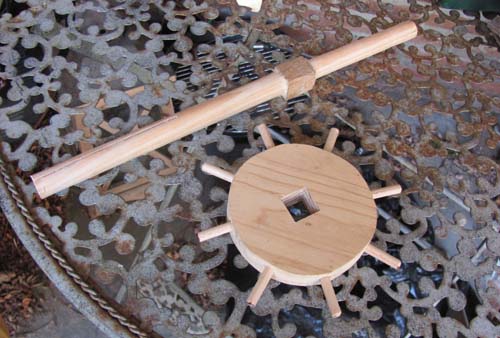
My fellow woodworkers gave me some antique nails to use (200 years old!). I nailed them into the leg construction, but they also turn out to serve perfectly as gear retaining pins, on both the front and back.
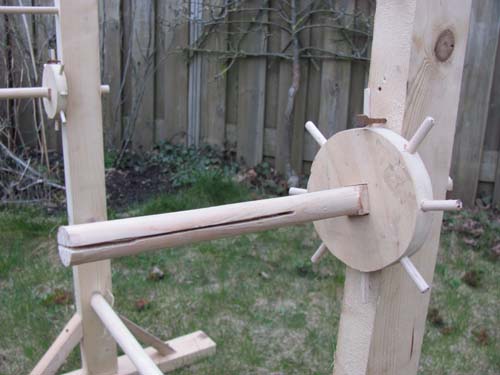
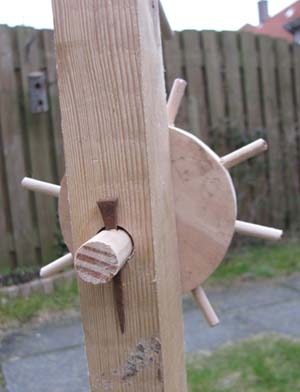
This is how you it looks when it’s in use: unwoven threads on one side, weaving on the other.
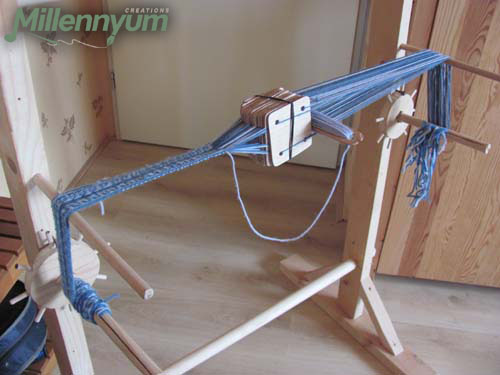
Thanks to the gears, you can easily tension everything and later loosen it if it starts pulling too much due to the turning of the tablets, and you can also roll everything to the side when you have reached the end of the loom with your weaving.
After taking these pictures, I gave the wood a coat of linseed oil for protection. And then I tested it in practice!
After several trial runs, it turned out to need a couple of improvements. I shortened the side poles a bit, because the stool I sit on during re-enactment events is lower than the chairs I have at home. Also, the pegs are rather small, causing them to bend inwards when they are put under tension. Which doesn’t help to maintain an equal tension in the weaving. And the slits in them are not very practical either, because when winding up the threads, they get wound over the knots I tied to attach them to the peg – which also makes the tension become uneven.
During the time I used this first version of my tablet weaving loom, I came across a method used by other card weavers that seems to work better. Not only is the roundwood thicker, but they also work with sticks attached to fabric, to which the weaving threads are tied, instead of to the rotating roundwood itself. After studying that, I concluded that I could perfectly well modify my loom so that I can also work with that method, without the loom looking any different than in the image. I do not know whether the method is historically accurate, but I did not know that about my previous interpretation either – I have not yet seen a single other picture of a loom like this, let alone one where the method of attachment was visible. But it seems plausible enough to proceed this way.
As an alternative for the winding mechanisms, I sawed two pegs (of the same thickness as the current hole in the loom), two gears, and made a hole in two thick round pieces of wood.
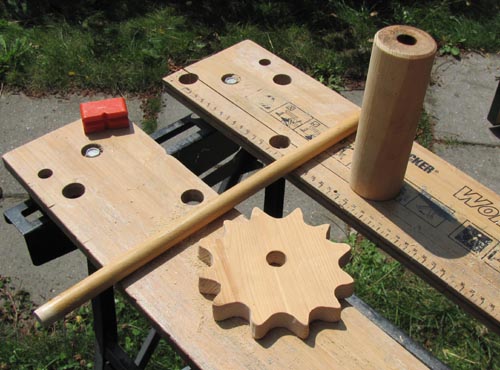
Finding those round pieces of wood was quite a challenge! Apparently, you don’t get round timber that thick at the hardware store. At least, according to the employees. It actually took some creative thinking: after hearing ‘no’ in the wood department, I continued browsing the store and found two wooden table legs. They were already exactly the right length, so all I had to do was remove the metal screw. 😎
The gears are now also of a much better shape than my previous ones, into which I had inserted dowels on the side. However, the medieval image shows that the gear is made from a single piece of formed wood. So that’s another win.
I glued and nailed the gear to the round block of wood (no, that’s not historically accurate, but unfortunately I don’t know anything about medieval carpentry). I then inserted the peg into it. The peg doesn’t need to be fixed in place; the idea is that the block can rotate around the peg. Since the peg also sits loosely in the opening in the loom, it can rotate there as well, which isn’t strictly necessary, but certainly helps. It also turns out that the tension on the threads helps ensure the peg won’t come out of the pole.
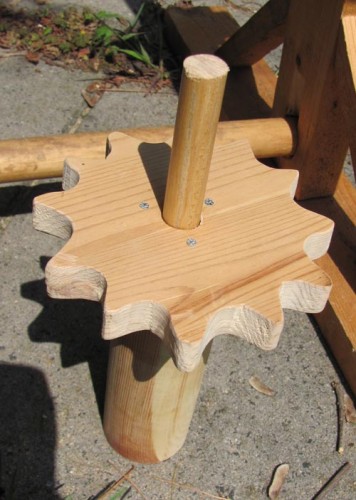
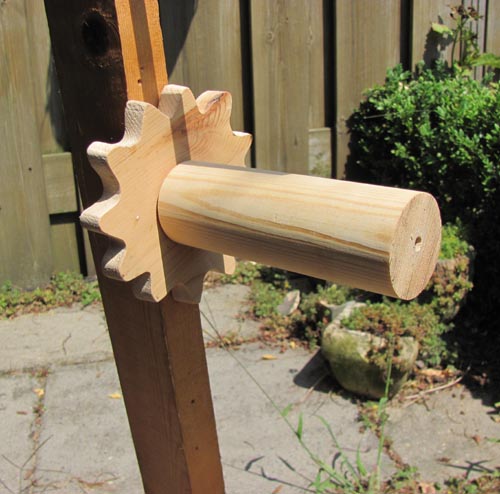
I then set to work with fabric and thread to make the fastening mechanism. One piece of wood goes into a piece of linen, which is then secured to the round block with small nails:
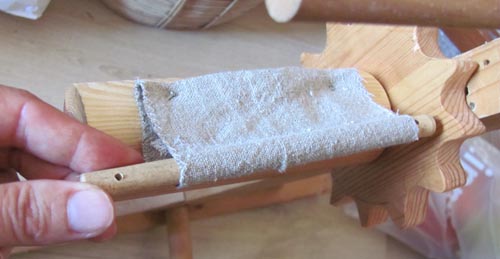
A second piece of wood is then attached to it through the holes in the small pieces of wood. I can attach my weaving threads to that piece of wood later.
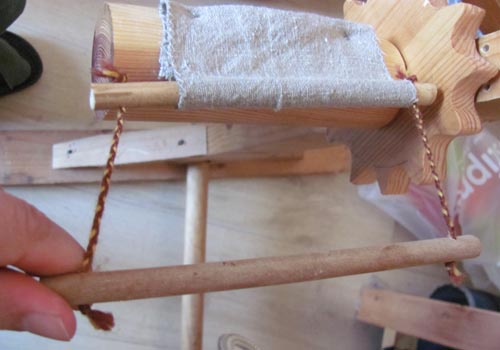
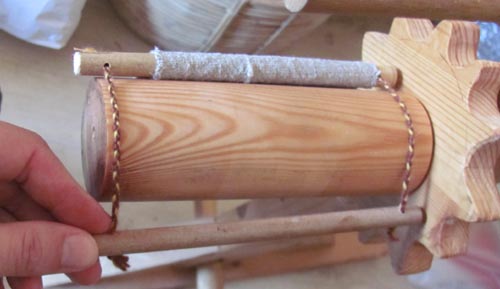
This is what my loom looks like now:
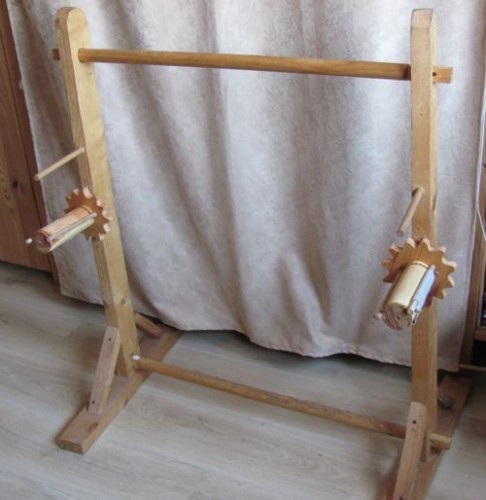
And this is the back. Now it’s even more comparable to the medieval illustration, right?
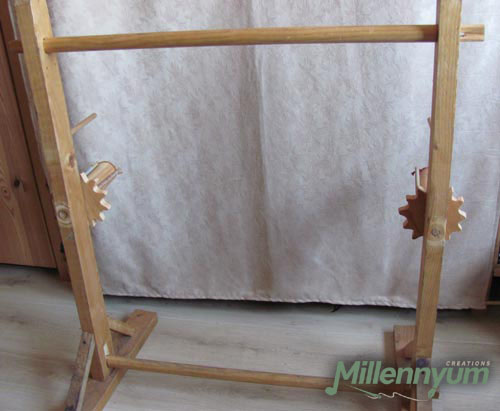
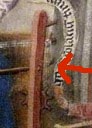
And you know what: I always thought that little bar in the picture was a second protruding peg, to hang the weaving over. But on closer inspection, could it be the small piece of wood to which you attach the threads? (Which means that Mary in the image has reached the end of her thread and cannot turn the wheel any further. Or that she has just started, and that that side is holding the finished fabric, waiting to be wound up when the weaving has progressed further.) It doesn’t explain the little protruding peg at the top tough.
My other theory is that the extra pegs are for winding on treads when preparing the weaving, in order to measure the length of the threads and make sure all are of the same length, before cutting them.
Well, who knows what kind of evolving insights I’ll have in the future! Some projects are never really finished…