
I’ve wanted a dress form (also called a mannequin) for a long time. Having one makes it far more easy to properly pin an outfit to the right size, especially dress or skirt seams. Also, it’s a great tool for photographing my outfits when there is no-one around to help me photograph them and/or I don’t feel like putting the whole thing on and going through the hassle of setting up a tripod and timer. Lastly, it’s very useful when you design clothes by draping fabric onto a dress form instead of drafting a pattern – although I’m not very good at that (yet).
Thing is: dress forms are expensive. They also have a couple of downsides. For starters, there are no dress forms that can be adjusted to fit anyone’s measurements. To begin with, there’s a fundamental difference in shape between men and women, so I can only use them either for women’s clothing or for men’s. On top of that, they come in different size ranges (small/medium/large/extra-large); even if I’d order one that can be adjusted to my own size, it still wouldn’t work for garments intended for plus-size women.
Furthermore, they can’t be fully customised to one’s own specific body. While you can adjust the hip, waist, and bust measurements (and sometimes the back length), they don’t account for things like a swayback (a hollow lower back), which I happen to have. So… how useful would they be for me, really?
After some pondering, I let go of the idea of a mannequin that fits other people’s measurements as well, and figured that a custom-made dress form, that accounted for my own unique body shape, was the second-best solution. You can have one custom made for you, but that’s ofcourse incredibly expensive. So, I resorted to my usual approach whenever I can’t find what I want in stores: make it myself! I’d seen plenty of examples online of people creating their own dress forms using duct tape. And if they could do it, why couldn’t I?
So I bought some paper packing tape at the hardware store (I’d read a tip suggesting that paper tape makes it easier to pin fabric to the form—your pins stay sharp longer and don’t get all sticky), and I found a broken wooden coat rack at a flea market to serve as a stand.
Step 1: The base shirt
I sewed a high-necked, close-fitting top out of some leftover stretch fabric. Alternatively, you could use an old shirt that reaches your hips and cover the neckline with extra fabric.
The tighter the shirt fits, the better; it results in fewer wrinkles while taping, which means fewer bumps on your finished dress form.
Step 2: Wrapping yourself with tape
Luckily, my partner was willing to help with this part- after all, you can’t exactly mummify yourself in tape all on your own…
It’s important to ensure there are as few bumps as possible in your layers during this step as well. And make sure you’re comfortable! It took 75 minutes to get me taped up and that is quite a long time to stand still and upright!
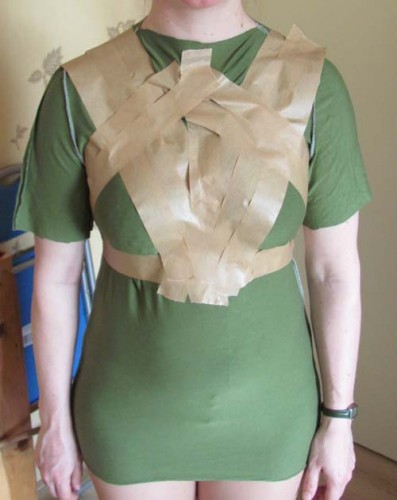
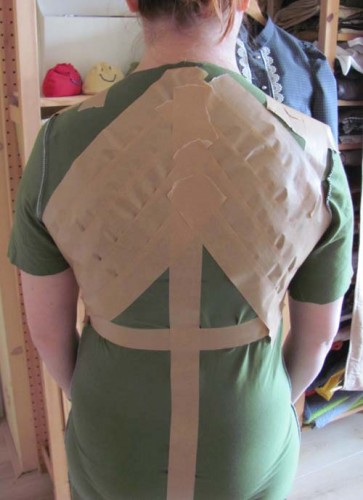
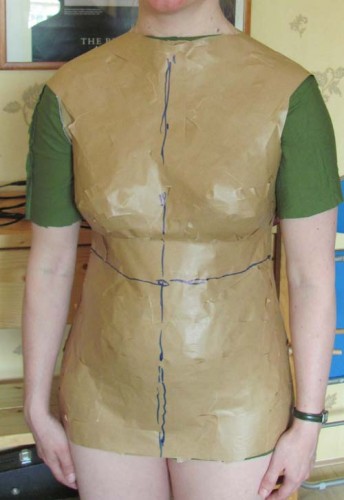
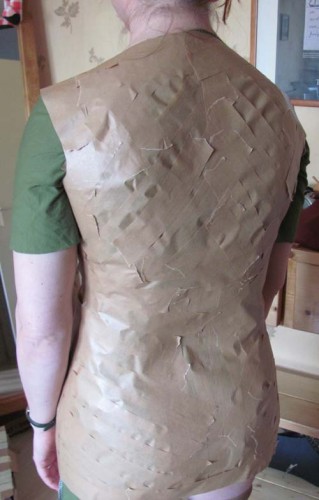
I had bought three rolls of tape, each 38 meters long, and we used them all up. We managed to apply two layers. In hindsight, I wish I’d added a third layer for extra sturdiness, but we’ll see how well it holds up.
Step 3: Getting out…
Fortunately, this wasn’t as difficult as I’d feared. My partner cut the whole thing open along the back, from bottom to neck (be careful not to snip your underwear in the process…), which allowed me to carefully wiggle my way out. I then taped the opening shut again. (Keep in mind not to use all your tape for the wrapping itself: you’ll need several strips left over for this part and for sealing up any openings!)
And just like that, you have a lifelike torso sitting on your table. A bit creepy, actually… 😯
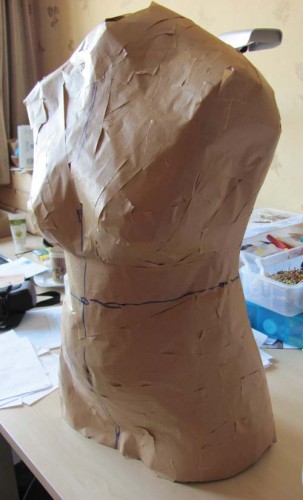
Step 4: Creating the mounting structure
I really lucked out with the old coat rack I found! I just had to saw off the section with the hooks at an aesthetically pleasing spot, and it was already more or less the right height.
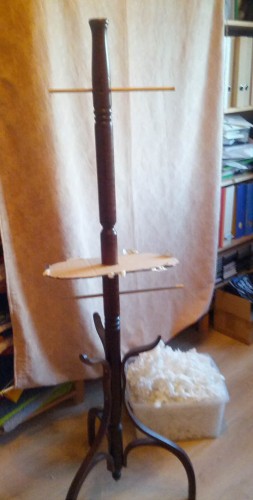
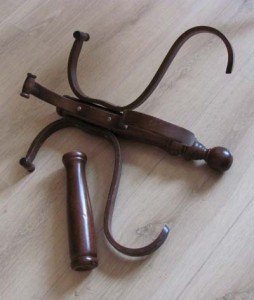
I then drilled two holes through it and inserted wooden dowels. The top one will hold the shoulders, while the bottom one supports the torso from underneath (but as I found out in step 5, I didn’t need the latter after all).
Luckily, I remembered to slide the piece of cardboard (cut to shape to close off the bottom of the form) onto the pole before attaching the rest of the structure. And you’ll have to pry open the torso near one of the armholes to slide the shoulder dowel through the pole after lifting the torso onto it, as its waist is too narrow to slide past the dowel.
Step 5: Filling
Initially I stuffed the mannequin with the contents of two old pillows, to make it a bit firmer. Later, I realised that this wasn’t the best solution: dressing a mannequin puts quite a bit of tension on the object. After all, your own breasts, buttocks, etc. have a bit of ‘give’ when you pull clothing over your body, but a dress form doesn’t. Consequently, I was constantly worried about denting the form. So I decided to fill it with expanding polyurethane foam (PU foam) instead.
I was a bit apprehensive about the stuff – what if it spilled out everywhere? Or what if it expanded so much that it deformed the dress form? But it worked out perfectly fine!
The first step was taping up the top to prevent any damage, then I turned the form upside down. I used strings to suspend the whole thing from the roof of our patio cover. I only have two hands, after all, and I certainly didn’t intend to stand there for hours in the same position waiting for the foam to cure…
The furniture placed around it serves to keep the form positioned straight on its pole – you wouldn’t want it ending up hanging crookedly on the stand.
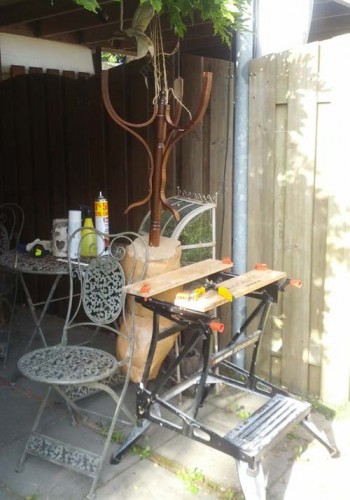
I started with one large and one small can (750 ml and 500 ml) of PU foam – or insulation foam, as it’s also called. I had no idea if that would be enough (or even if it was the right material – why does it go by so many different names?), but I figured I’d just see how it went.
I was unpleasantly surprised that in no time, the large bin was empty, and only this part of the mannequin had been filled:
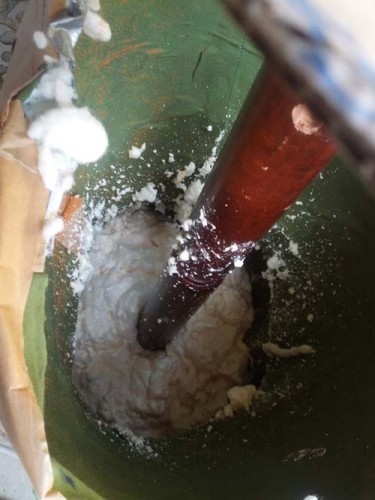
But patience is a virtue. I suppressed the urge to race to the hardware store to buy two more cans and waited for the foam to expand and cure. The instructions optimistically claimed that the foam should be completely hard within 45 minutes. Well, that might be true when filling narrow gaps, but when you’re filling an area as large as this, it turns out you need to wait at least 3 hours. 🫤
Eventually, fortunately, the foam had expanded quite a bit:
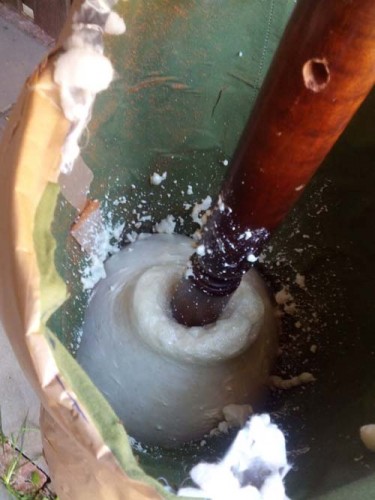
So I added the contents of the second (smaller) canister, and once again wondered if it would be enough. After a whole lot more patience, it turned out to be exactly enough!!
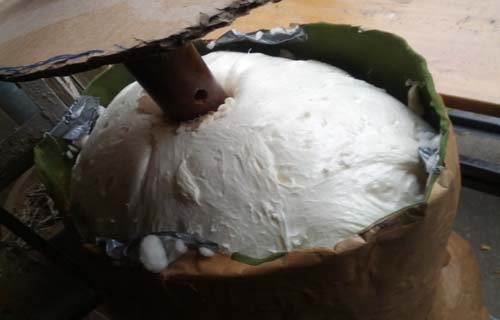
The expanding foam had bulged up just a tiny bit too high in the middle, but it was super easy to trim off the excess using a small saw. I used the trimmed-off material to further fill in the gaps along the edges, and I stuffed any remaining holes with cushion filling.
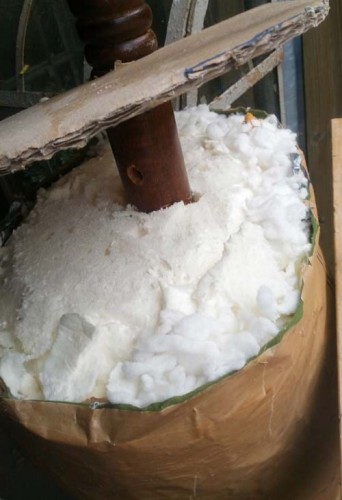
The whole process was much easier than I had feared. There is a slight distortion around the neck, and the tape near the buttocks came loose a bit due to the expansion, making the form slightly wider than the original. But it shouldn’t make much of a difference (and besides, I expect that, if anything, I’m more likely to get wider rather than narrower in those areas in the future 😉).
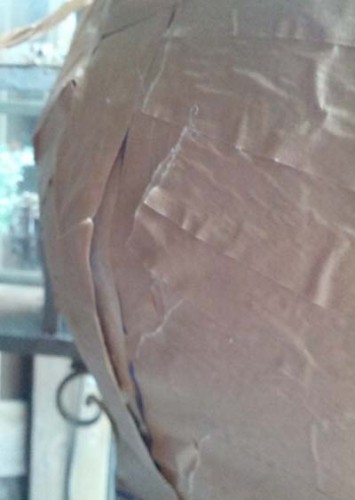
Step 6: Sealing and finishing touches
Next, I taped the cardboard base onto the bottom. The crossbar at the bottom, which was supposed to support the torso, is no longer needed because the polyurethane foam adheres directly to the coat rack. The crossbar running through the coat rack at armhole level is now encased in the insulating foam and provides additional support.
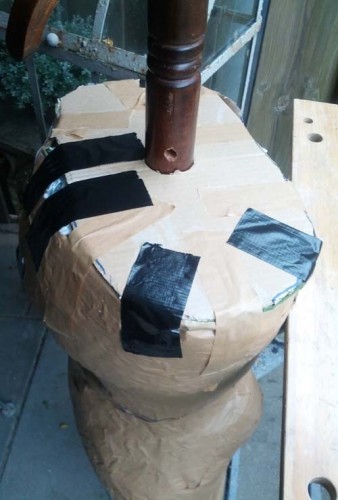
For the sake of aesthetics, I sawed the nice top piece off the remainder of the coat rack and glued it onto the end of the stand.
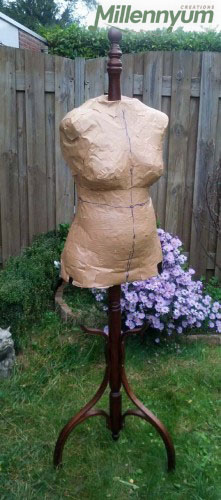
Step 7: Dressing it up
A structure made of paper tape isn’t exactly a feast for the eyes, so I sewed a fitted shirt out of some leftover fabric to give it a nice look.
The best fit is achieved by pinning the fabric inside-out onto the dress form, then stitching it shut tightly along the edges.
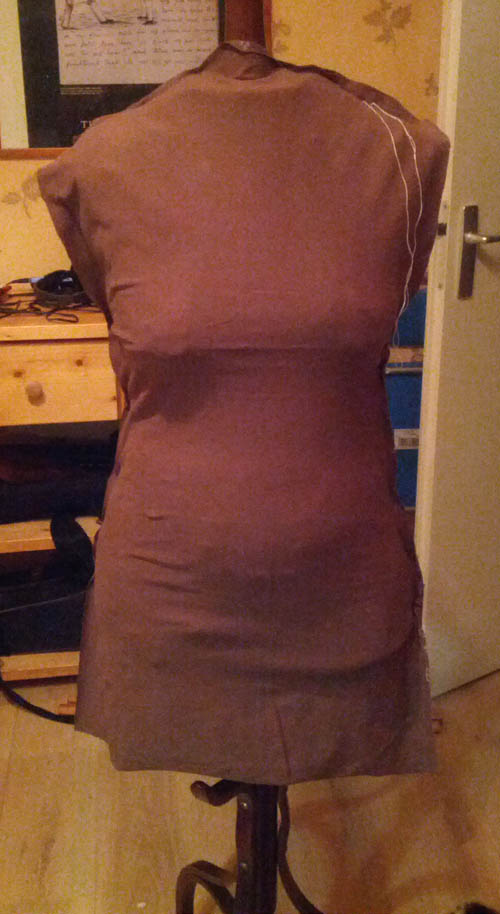
Closing up the armholes required a bit of improvisation, but it turned out quite well.
The final result
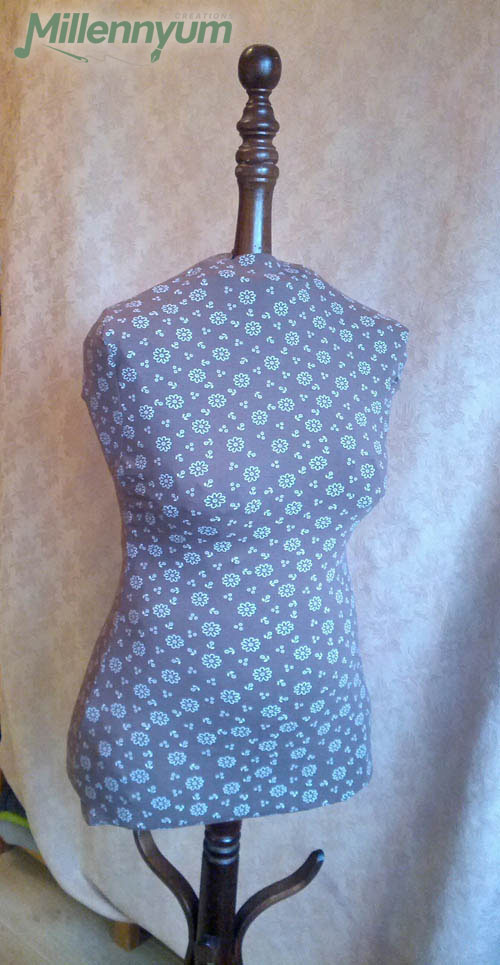
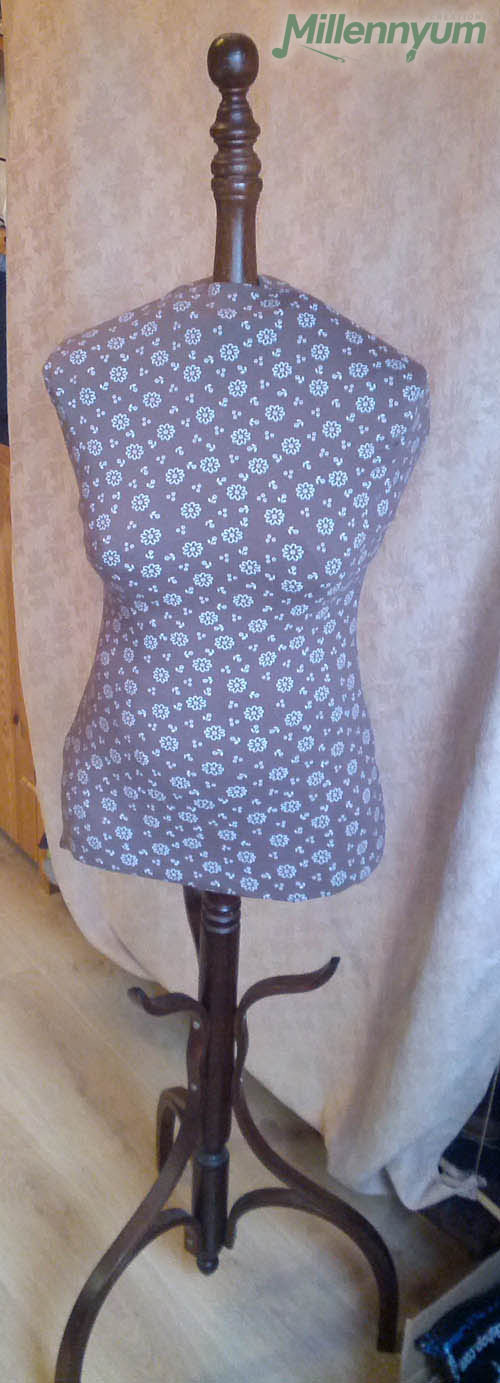
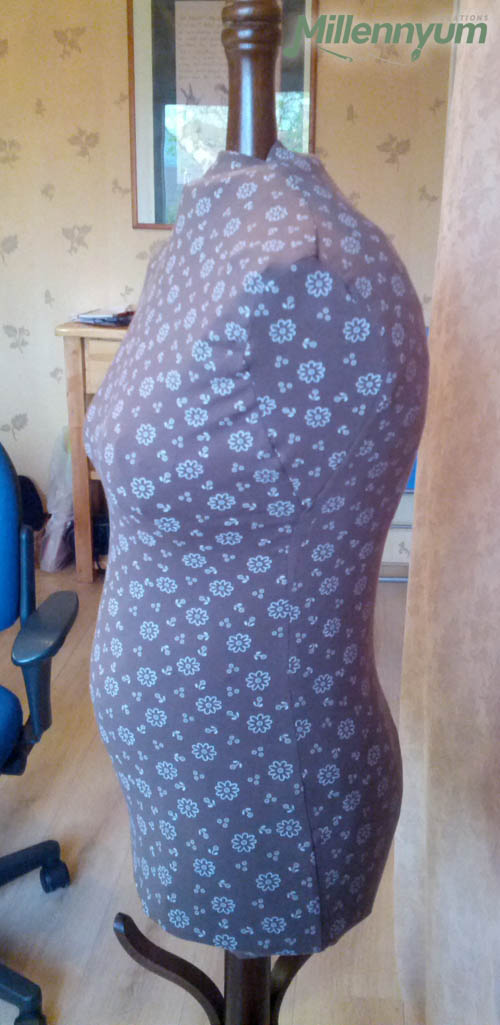
In terms of weight, it’s a very manageable thing – as polyurethane foam weighs next to nothing, the dress form is still easy to lift.
And yes, I can stick pins into it! You have to push a bit firmly to get them in, but I think that’s mostly because you have to get through the layers of tape first – the polyurethane foam itself is actually quite easy to pierce.
I did just realise that most dress forms have a neck, too. We forgot to tape that part. Does that matter…?
Total cost: only €42,15! That breaks down to €10 for the coat rack, €16,15 for the paper tape and €16 for the PU foam. I already had the fabric and small wooden slats on hand. The cardboard came from a box I fished out of the recycling bin.
In hindsight, the packing tape might not have been the best choice – the ends tend to come loose and curl up. Perhaps a different type would have worked better. I’ve since learned that you can get paper-based tape at craft stores that you have to wet, which might create a more cohesive, bonded surface.
However, it looks really great! I’m rather proud of it and very happy with the result, and I’d definitely recommend this process to anyone else looking to make their own dress form!