
I am both a marketer and a musician, which means that I am not only focused on making beautiful music, but also think about the picture we create towards the audience. After having made stage costumes for my balfolk band Androneda, I also wanted stage dressing. After all, most balfolk stages aren’t very atmospheric, so if you bring something yourself, it quickly makes a difference. I came up with the idea to make a stage backdrop with our logo, and actual lights representing stars in space!
It was going to be a massive challenge, because I hardly had any experience with electronics. I did remember what a resistor and a cathode were thanks to the electronics kit I had as a kid, but that was quite a while ago. I went ahead anyway and bought a large purple curtain measuring 3,5 by 2,5 meters from a thrift shop.
Despite all the challenges I had already spotted, I had still underestimated the project a little. First of all: running nearly 9 square meters of fabric through your sewing machine is quite a challenge. After all, if you have to sew an appliqué in the middle of it, half of the fabric has to be accommodated in the arm of your sewing machine. It took a lot of stuffing!
To put the logo on the curtain, I first printed the appliqué on paper so that I had a pattern for cutting the fabric in the correct shape. Then the paper served as a template to perfectly align all elements on the curtain.

When you appliqué fabric onto another type of fabric, it always pulls a bit. Normally, bumps of a few millimeters aren’t insurmountable, but on such a large surface, it creates a ‘butterfly effect’ and eventually pulls everything into the wrong direction! 😔
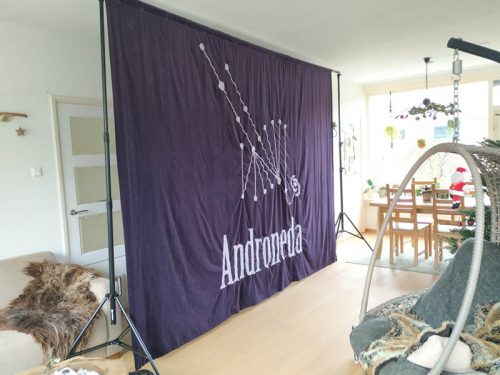
According to my sewing teacher (whom I only asked for advice afterwards, of course), I should have glued it down with fusible interfacing first and only then stitched it. Oh well, that’s a lesson for next time. Eventually I completely unpicked and reattached several pieces, which fortunately did help somewhat.
I had also underestimated the amount of thread needed: to zigzag the edges of such large pieces of fabric (and be able to redo sections), I needed no less than 5 spools of sewing thread!
And that was just the sewing. Then came the electronics. Fortunately, I had my ‘king of flashing LED lights’ brother-in-law, who was willing to give me a (considerable) helping hand. Otherwise, I would have had to do a whole study first to find out which stuff is suitable for which situations (How bright are these LEDs? To what extent are they programmable?), what you need to pay attention to (What voltage power supply goes with it? Which controller can drive this?), and what the most obvious causes of problems are if it doesn’t work.
The original plan was to use LEDs specifically made to be sewn into fabric and connected with conductive thread. What cool stuff! I was absolutely thrilled by all the possibilities. But 120 of those programmable units became very pricey. The second plan, to sew ordinary individual LEDs into the fabric, also fell through, because 120 lights cannot simply be connected in series on a low supply voltage. And if you create a lot of parallel clusters of LEDs, it becomes quite a challenge to prevent all those wires in the fabric from crossing each other.
After analyzing a lot of options for suitability (is it flexible and flat enough to be incorporated into foldable fabric, bright enough to be visible from a stage, and programmable with Arduino?), we settled on ready-made LED strips that I could connect in series. I ordered them via AliExpress (which I’m not a fan of, but it simply wasn’t available in Europe). I needed no less than 5 strips of 150 LEDs to cover the entire backdrop.
Then I could solder the all the LED strips together, as well as the plugs for the Arduino controller and power supply to their corresponding cables. Not that I’m very good at soldering… and I only have a crappy soldering iron lying around that I got from my high school boyfriend a long, long time ago. So I taped the cable ends down securely as well.

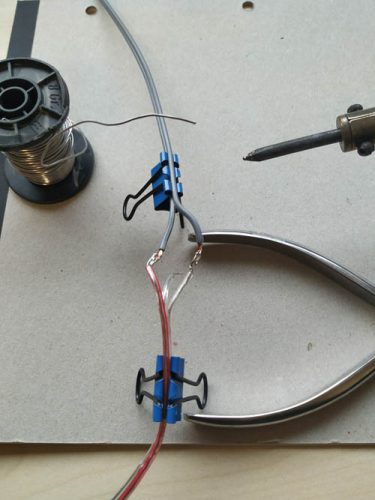
The Arduino controller we initially choose turned out not to support more than 109 LEDs, so I had to replace it with a controller with more capacity. It also needed a different cable to connect it to my pc, which I had to order as well.
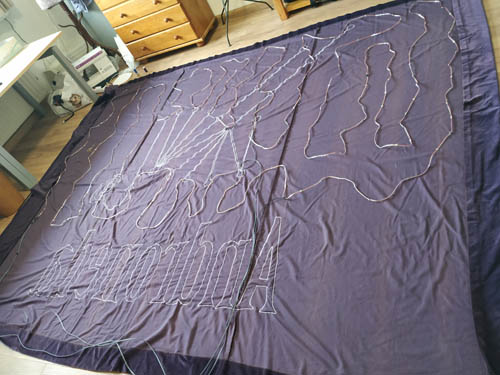
While waiting for their delivery, I started the task of hand-sewing all the LEDs onto the curtain. As they were rather close together, I decided that half of the LEDs would remain behind the fabric and would be turned off. That still left many lights to hand-stitch and punch holes in the curtain for. As I was pressed for time, instead of neatly finishing all the punched holes to prevent fraying, I smeared nail polish onto the edges. Works as well (I hope) and it’s a lot faster. (Note to self: leave the window slightly ajar next time, because after a day of painting, you’re high on the smell!)
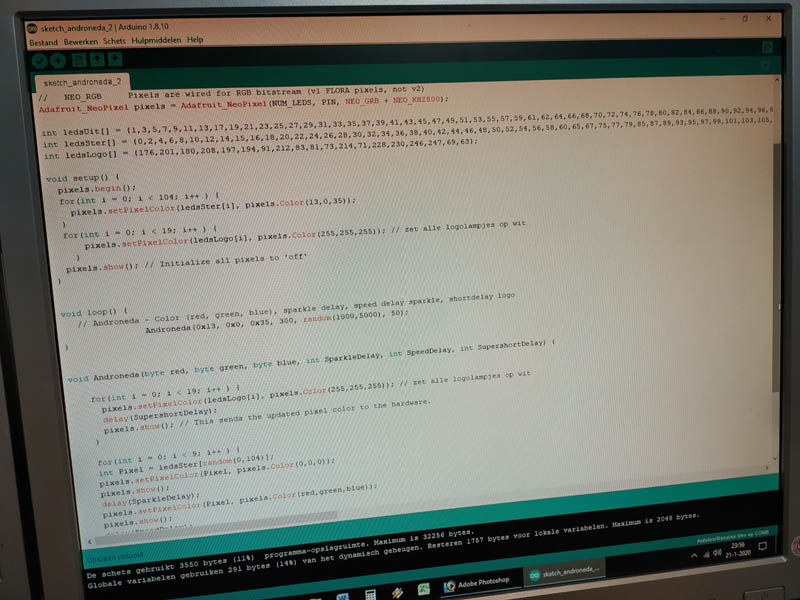
Programming the LED strips turned out to be the easiest part of the whole project. C++ isn’t that difficult and I have programmed in other languages before, so I understand the basic concept. Moreover, there are a lot of example scripts to be found online that I could tweak to my own wishes.
Then I connected the LED strips to the Arduino controller and the power supply (for which my awesome brother-in-law 3D printed a case), the controller to my computer, and uploaded the script I wrote to the Arduino controller. Of course it didn’t work right away, but after some fiddling with the cables, settings and script, I finally got it working! And it is AWESOME!! 🤩
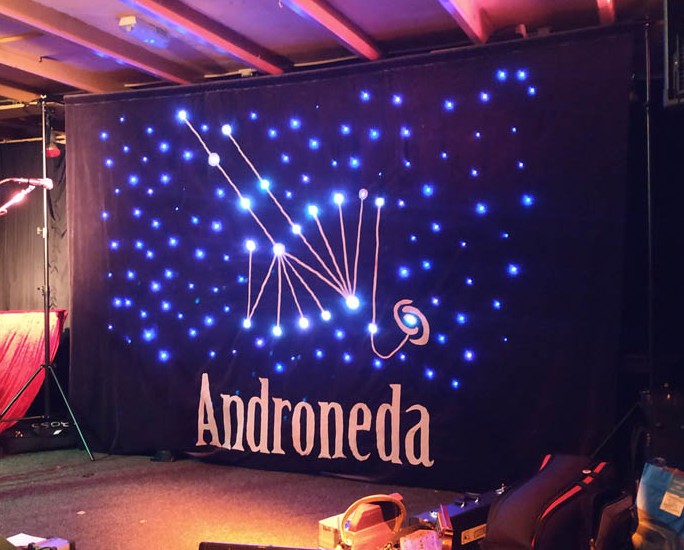
The stars in the logo are programmed with several different effects. The stars around the logo fade in and out randomly.
It also worked really well on stage. And you can hide a whole lot of junk, like instrument cases, bags, jackets, and more behind it so the stage stays tidy! Plus, as an unexpected additional functionality: you can change behind it if you haven’t put on your stage outfit yet! 😜
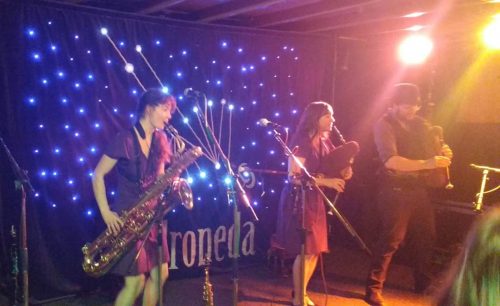
Total costs: €157,68 (€26 for the curtain plus shipping costs, €18,30 for sewing thread(!) and €113,38 for electronics and cabling. The fabric for the appliqué is a leftover from what I bought for a Victorian skirt.) Not included in those costs: €116 for the tripod (a background system actually intended for photography).
Time spent: Not tracked. I don’t think I want to know…